Studio Commits
Overview
Modified items are sent back to the Repository via *Commits.*A commit is a bundle of one or more modified items that as one unit are sent to the repository to create new versions of the items included in the Commit. The commit is treated as one transaction: Either all new versions are committed successfully or none at all.
Some advice on good Commits:
- Keep commits small. Large commits are difficult to understand and describe.
- Make a commit a consistent change. If, for instance, you add a new Condition Rule and use the new rule on a Target Object, commit the new rule and the modified Target Object together.
- Strive to leave the project consistent with each commit. In the example above, avoid committing the new version of the Target Object without committing the new rule as this would leave the project inconsistent.
Pending Changes
The Pending Changes tool window lives on the left edge of the Studio window (unless, of course, you undock it and move it to somewhere else). Hover the mouse over the Pending Changes tab to expand the tool window:
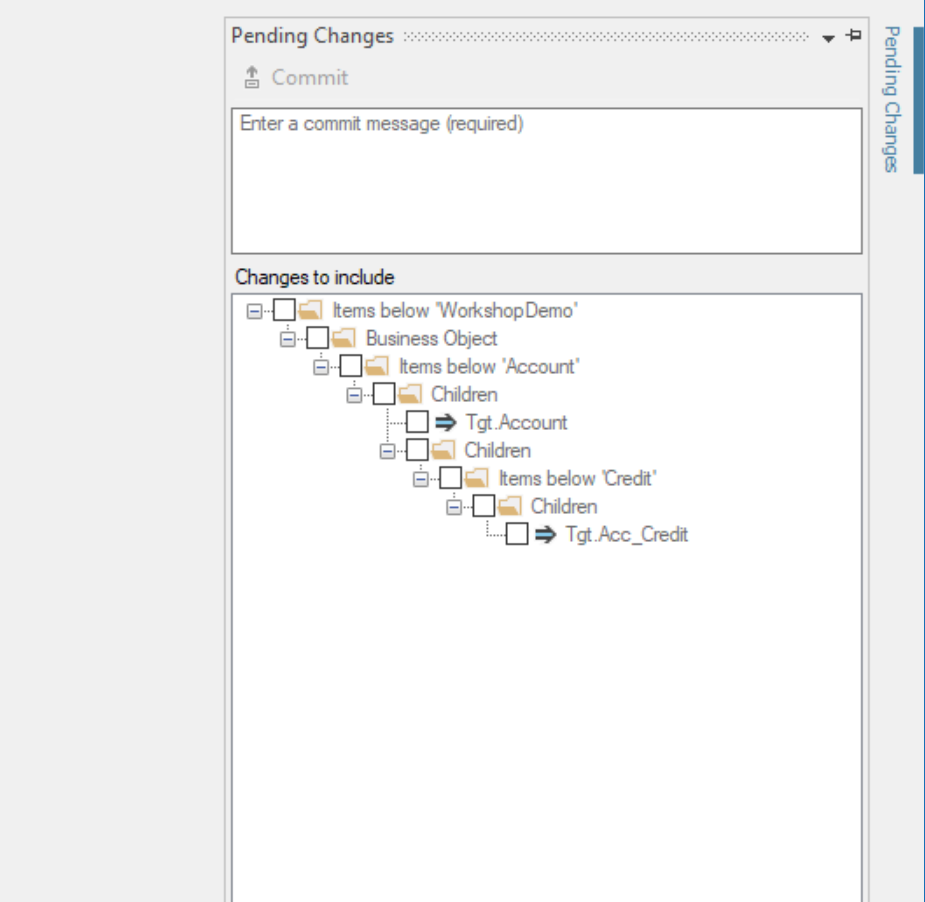
Use the checkboxes in the treeview to compose the commit, write a good commit message and click the Commit button to send the commit off to the Repository.
Commit Messages
A commit is accompanied by a message to describe the change that is being committed. Good commit messages are essential and should be required for all commits. Indeed, the default setting in the Repository Manager is to require messages on all commits. While it is possible to change this policy to make commit messages optional, it is highly recommended to refrain from doing so. Looking at the version history of a given item is, after all, vastly more meaningful if each version has a descriptive message.
The commit message should be to the point and accurately describe the commit. It is good practice to use imperative statements to signify what the commit does: Write 'Add account business object' rather than 'Added account business object'.
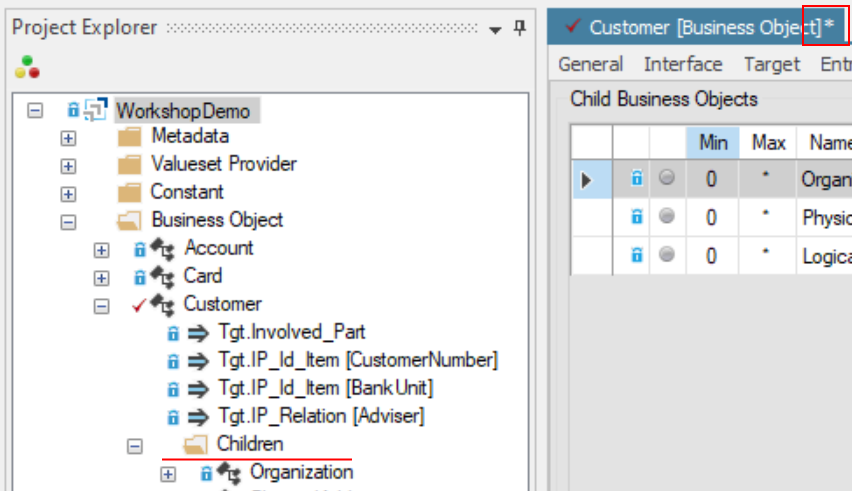
Item Deletion
Deleting an item is a 2-step process:
- At first, deleting the item marks it as deleted in Studio and also checks out the item for deletion. It follows that it is not possible to delete an item that is checkout to somebody else.
- When you commit, the item is deleted from you workspace and from Studio and the deletion is committed to the Repository.
Deleting an Item
| Current User | Other Users |
|
|
|
|

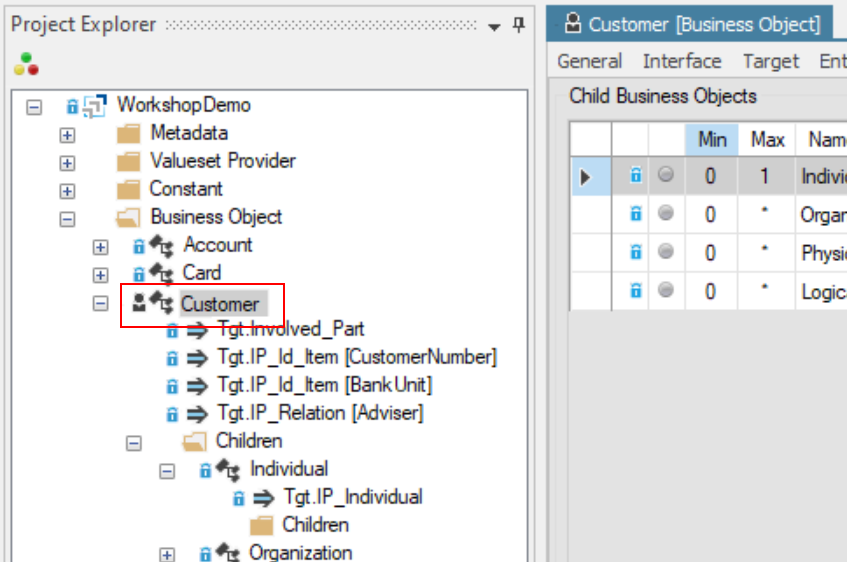
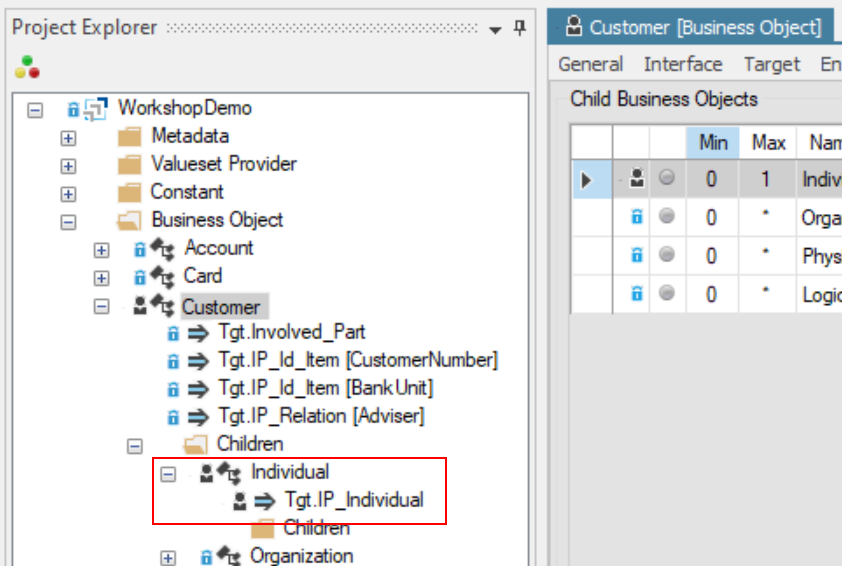
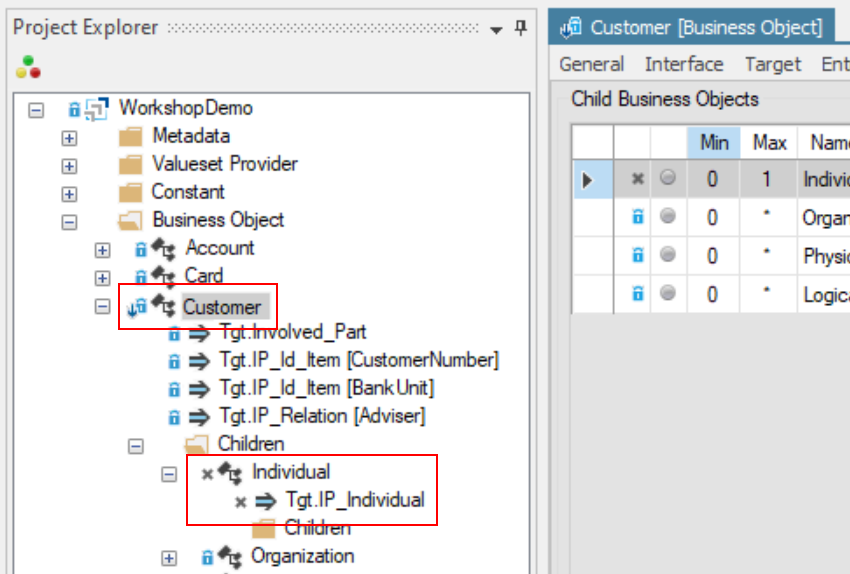
Deleting a Child Item in the Target Map
In the Target Map, parent items contain references to all their child items. In order to delete a child item, the parent item must be checked out:
| Current User | Other Users |
|
|
|
|
|
|
|
|

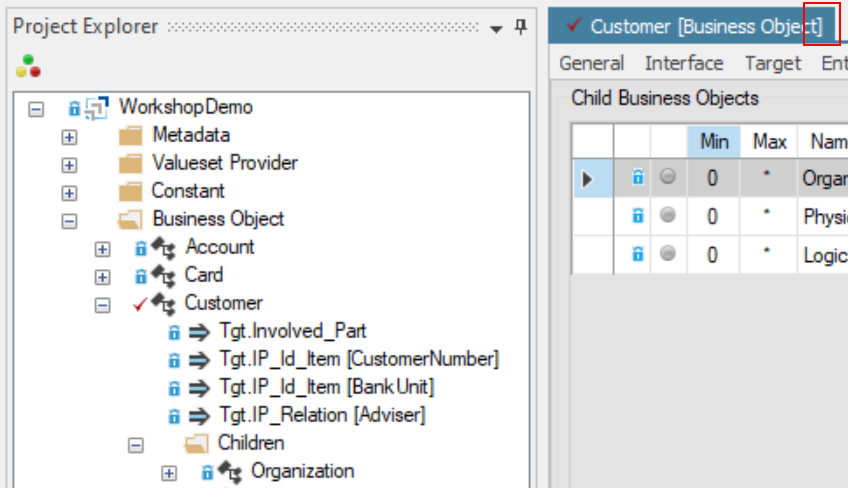

Deletion Commits
When an item is deleted, the commit of the deleted item simply creates a new version of the item. This new version is marked as deleted.
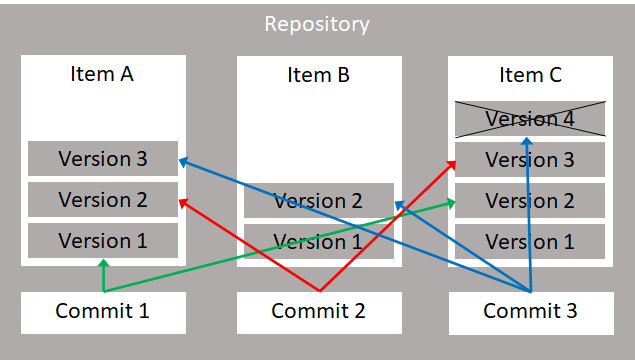
The figure above illustrates three commits:
| Commit 1 |
|
| Commit 2 |
|
| Commit 3 |
|
Reverting a Commit
It is possible to revert a commit. This means that Studio will inspect the commit to be reverted, and for each item in the commit, find the version that was previous to the commit being reverted. Studio will then create a new commit to create new versions of the items equal to the previous versions. If the commit being reverted added an item, the new commit will create a delete-marked version for this item.
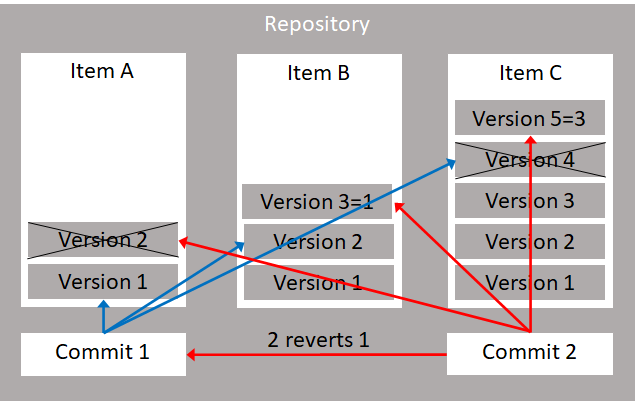
Commit 1 |
|
Commit 2 (reverts Commit 1) |
|
Use the checkboxes in the treeview to compose the commit, write a good commit message and click the Commit button to send the commit off to the Repository.