Creating and Using Items
Creating an Item
To create an Item navigate to the Items option in the main menu for a Project.
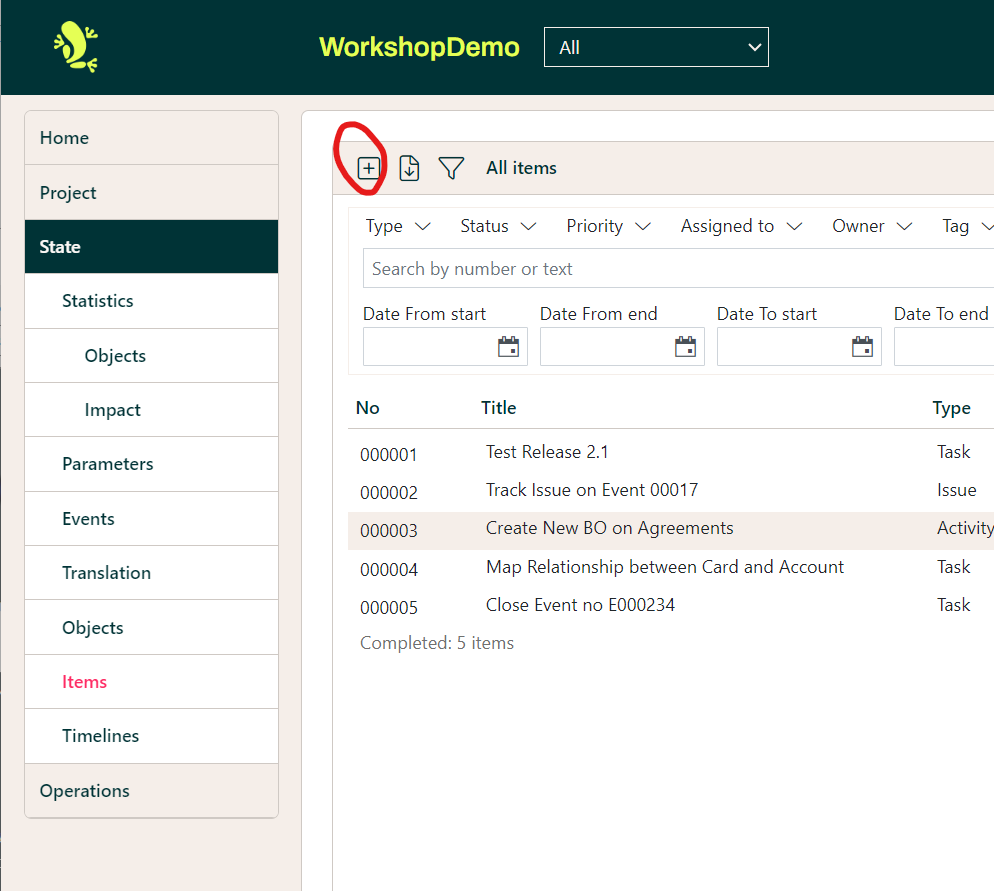
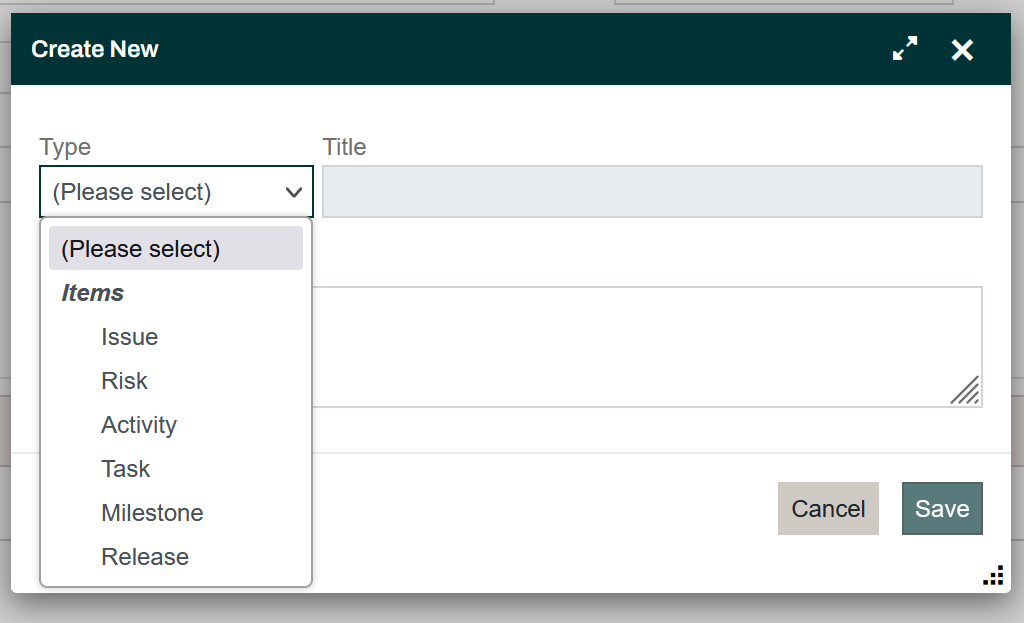
Click on the plus icon on the left of the header bar of the list to bring up the Create Item dialogue box.
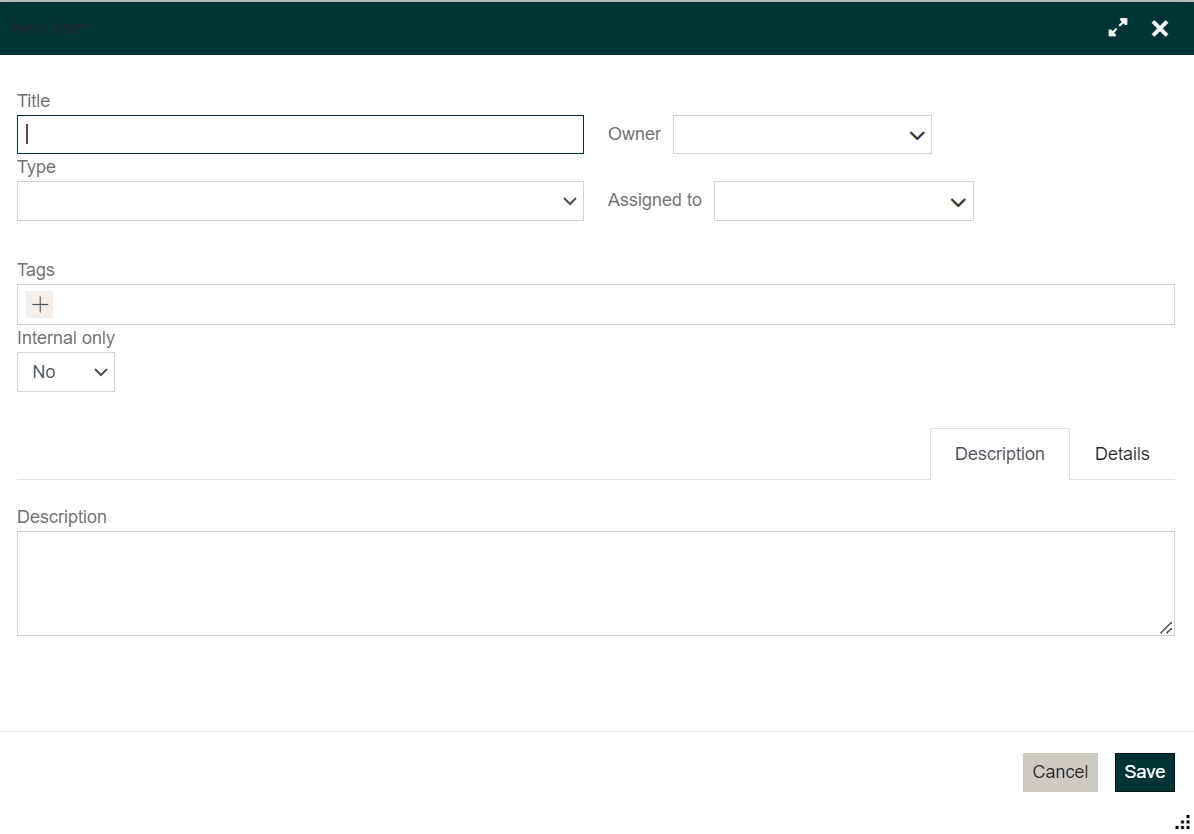
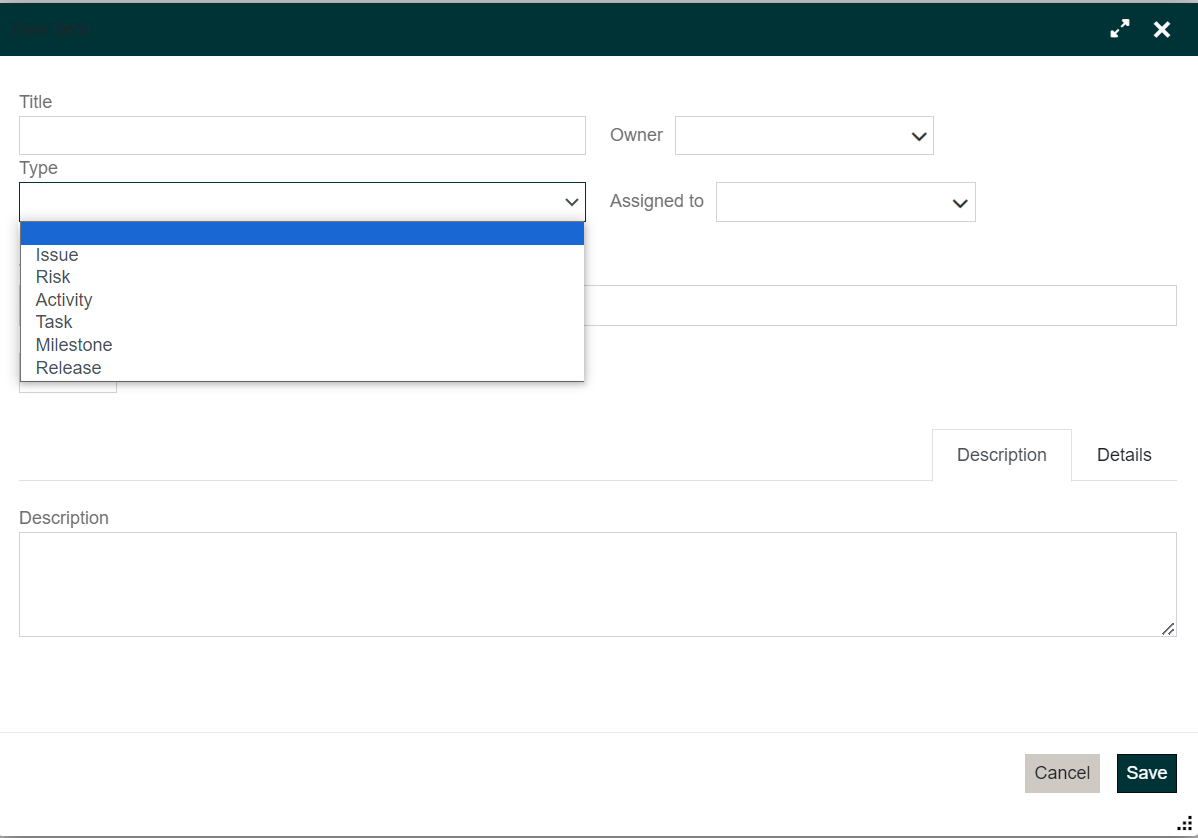
Complete the Title field and select the Type of Item you wish to create from the drop-down list. You may complete any of the other fields that are relevant, it is recommended that you at least complete the Description in case your Title is not explanatory enough of the reason for creating the Item. If you select Internal Only as Yes the Item will not be visible to External users.
Once the Item Type has been selected that will determine the optional fields to be displayed in the Details tab.
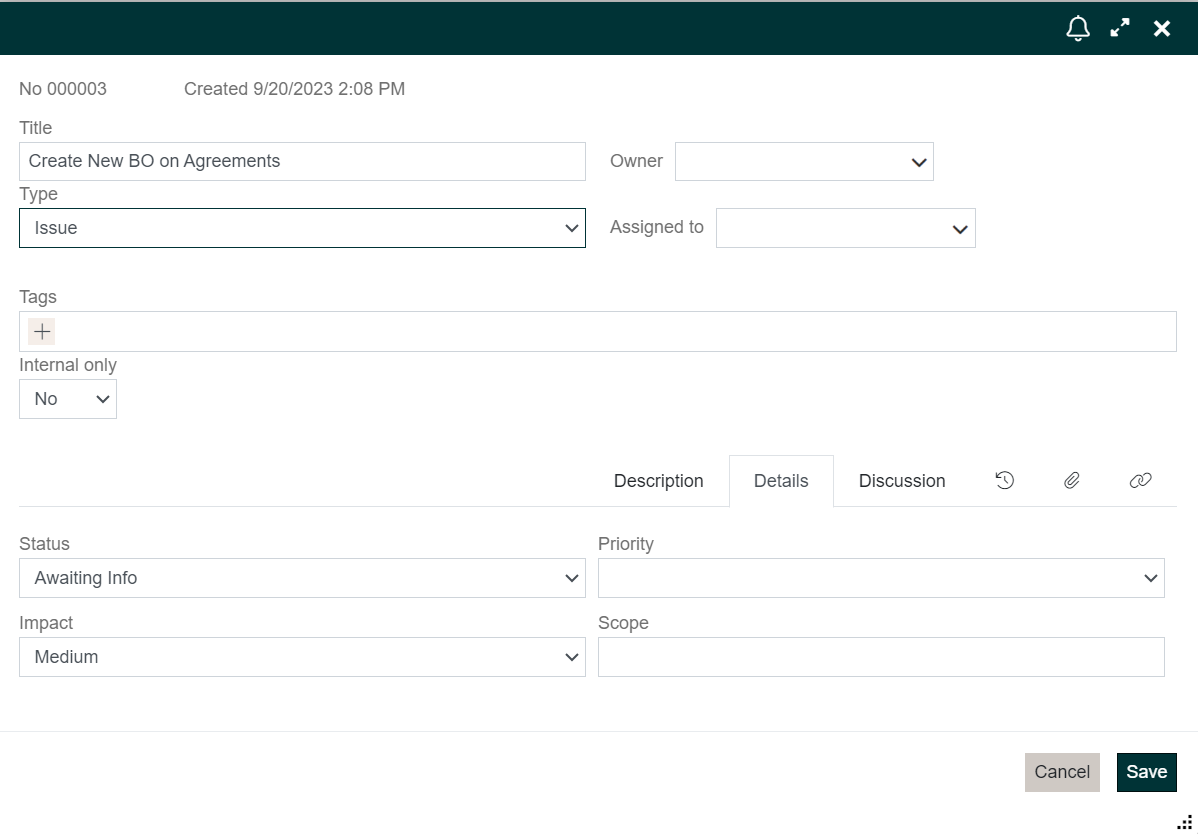
A number of these may be Mandatory and if they are and you try and Save the Item an error message will be displayed and you will have to complete these fields before you will be able to Save the newly created Item.
Once you have completed any Mandatory fields and any others you wish you can save the Item and it will appear in the Items list having been assigned an Item Number automatically.
Filtering the List of Items
In order to locate the Item(s) in which you are interested, the list can be filtered on a number of criteria, including a text search. Navigate to the list of Items for a Project and click on the Funnel icon in the Header bar. This will display the filters that are available.
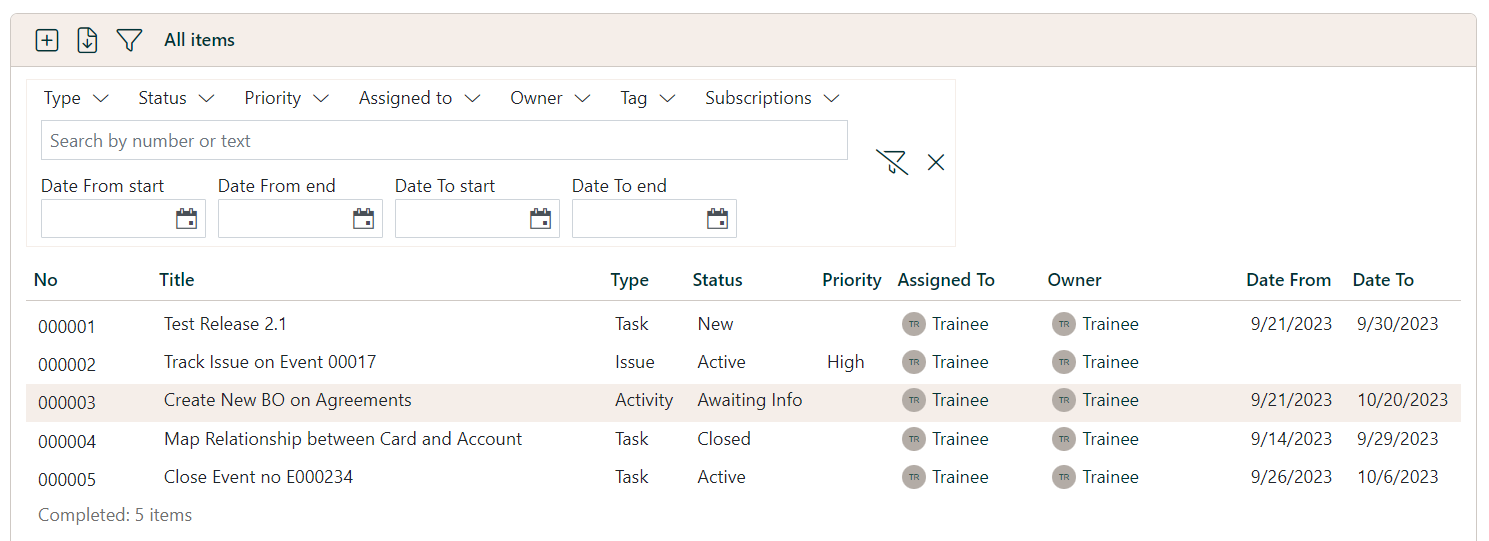
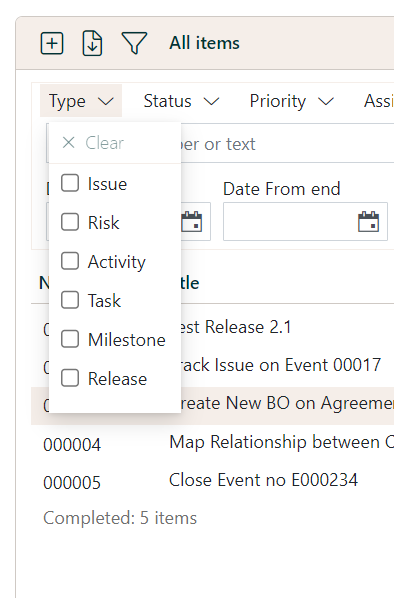
To use a Filter on Type, Status, Priority, Assigned To, Owner, or Tags, click on the downward pointing arrow next to the Filter's name to display the values available for selection.
This will display only those Items to which the selected Filter(s) apply.
To search type the text you wish to locate and the search function will scan the Item Number, Title, and Description once you stop typing. To locate an Item based on the Date From or Date To enter dates in the relevant boxes.
To clear all Filters click on the Funnel icon with the line through it and to close the Filters click on the cross.
Linking Items
Any Object (Item or Area) can be linked to one or more other Objects and the links will appear on both Objects that have been related.
The link can be given a description to explain what relationship exists between the Objects for other users.
The link may be used to navigate from one Object to the other and vice versa.
You can make a link between two existing Objects or create a new Item as part of the process.
To establish a link to an Item navigate to the Items list in a Project and open the edit dialogue for one of the Items you wish to relate. In this dialogue select the tab with the two interlinked ovals.
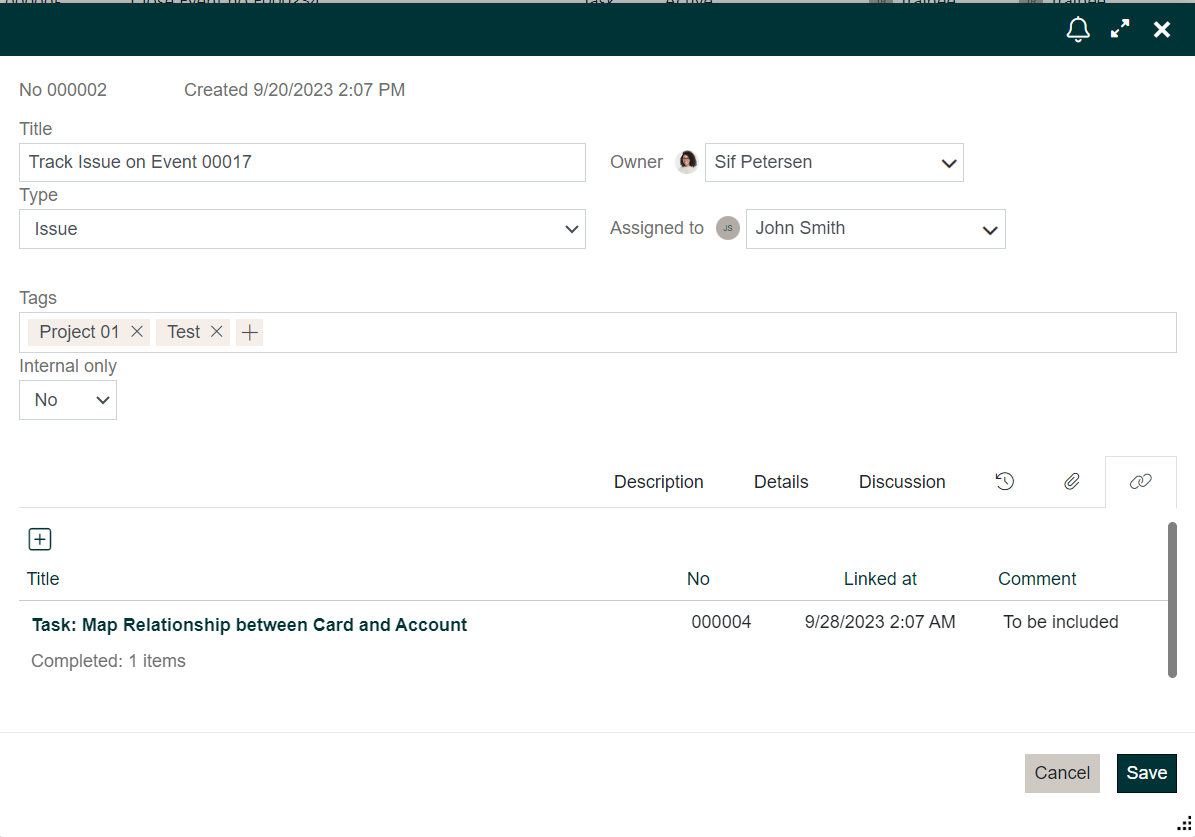
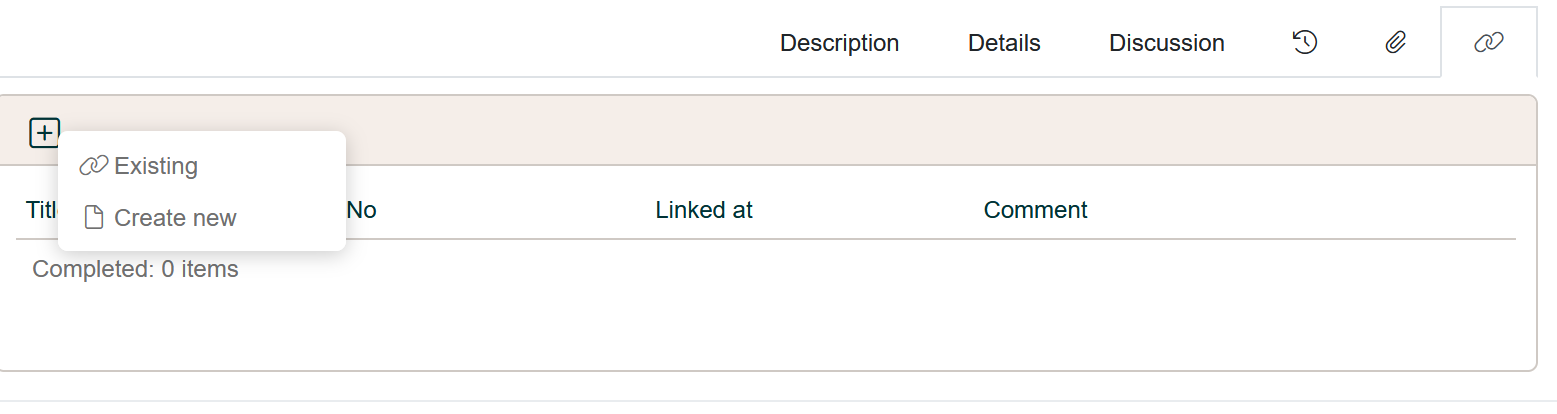
This will display any existing links and give you the opportunity to create a new one by clicking on the Plus icon above the heading Title.
When you do so you will be asked if you wish to create a new item or link to an existing Object.
If you select Create New you will be presented with a dialogue allowing you to select the type of Item you wish to create.
Select the Item Type, give the new Item a Title and add a description to the link, and you will be presented with the dialogue which allows you to complete creating the new Item. Both the existing Object and the new Item will have the link displayed.
Otherwise you will be asked to select the Object to which you wish to link.
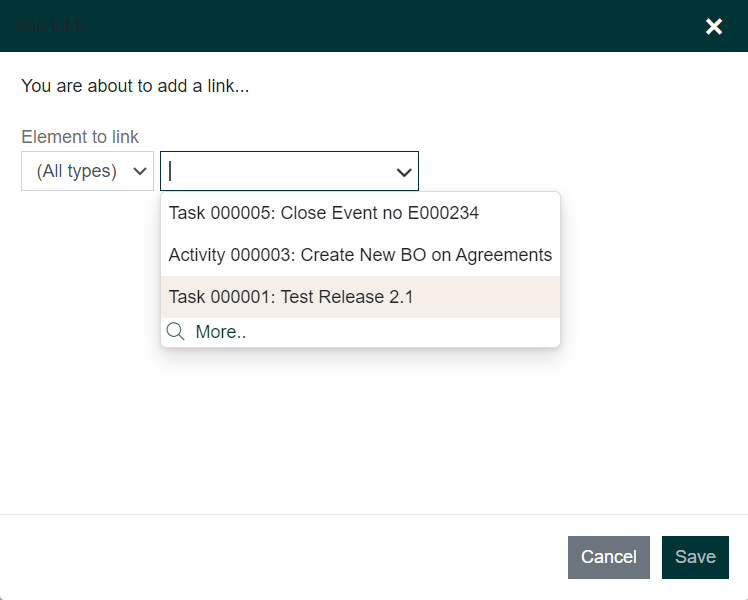
This allows you to locate the Object to which you wish to link the Item that is in the edit dialogue. You can narrow down your search by identifying the Item Type to reduce the length of the drop-down list of potential Items. Select the Object and give the link a description.
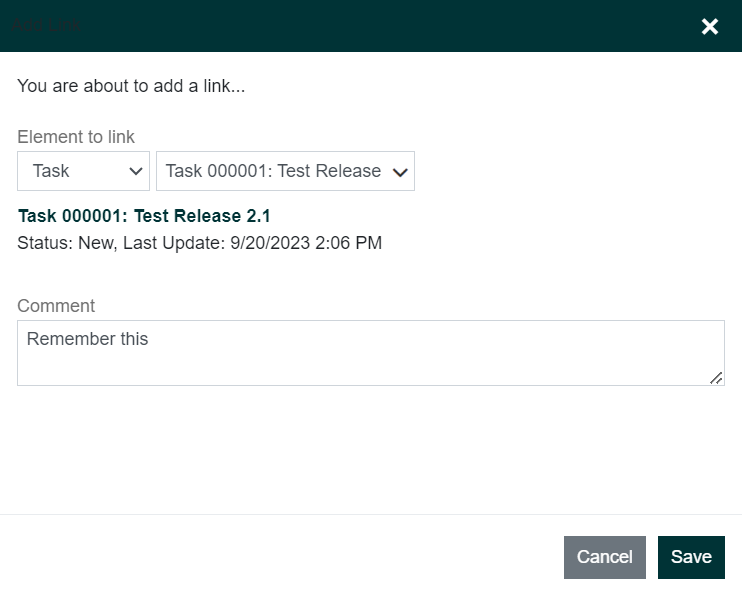
Save the link and it will appear in the links tab on both Objects.
The process is the same for other Objects.
Adding a Document to an Item
Once you have created an Item you may upload documents to be retained with the Item and be available for other users to inspect. Any document file up to 3MB in size may be uploaded.
To do this navigate to the Item list in a Project and select the Item to which you wish to add your attachment.
Click on the Item Number to open the Edit dialogue for that Item.
Select the tab with the Paper Clip icon and click on the Plus icon next to the heading Title.
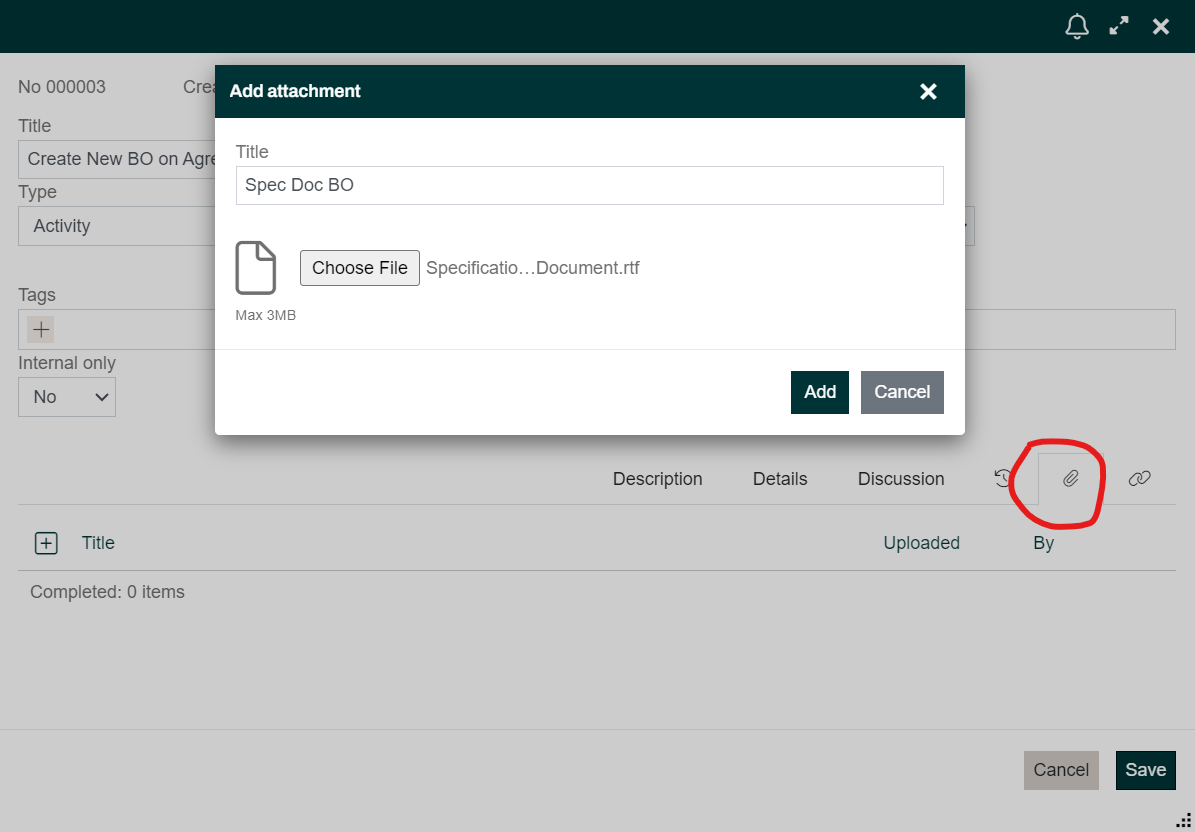
This will display a dialogue which allows you to browse and select the file you wish to upload and give the file a meaningful Title which will be displayed in the Attachments tab.
Once the Item has been saved, a Paper Clip icon will be displayed in the Items list to indicate that there are one or more attachments on this Item.