Item Manager
Settings
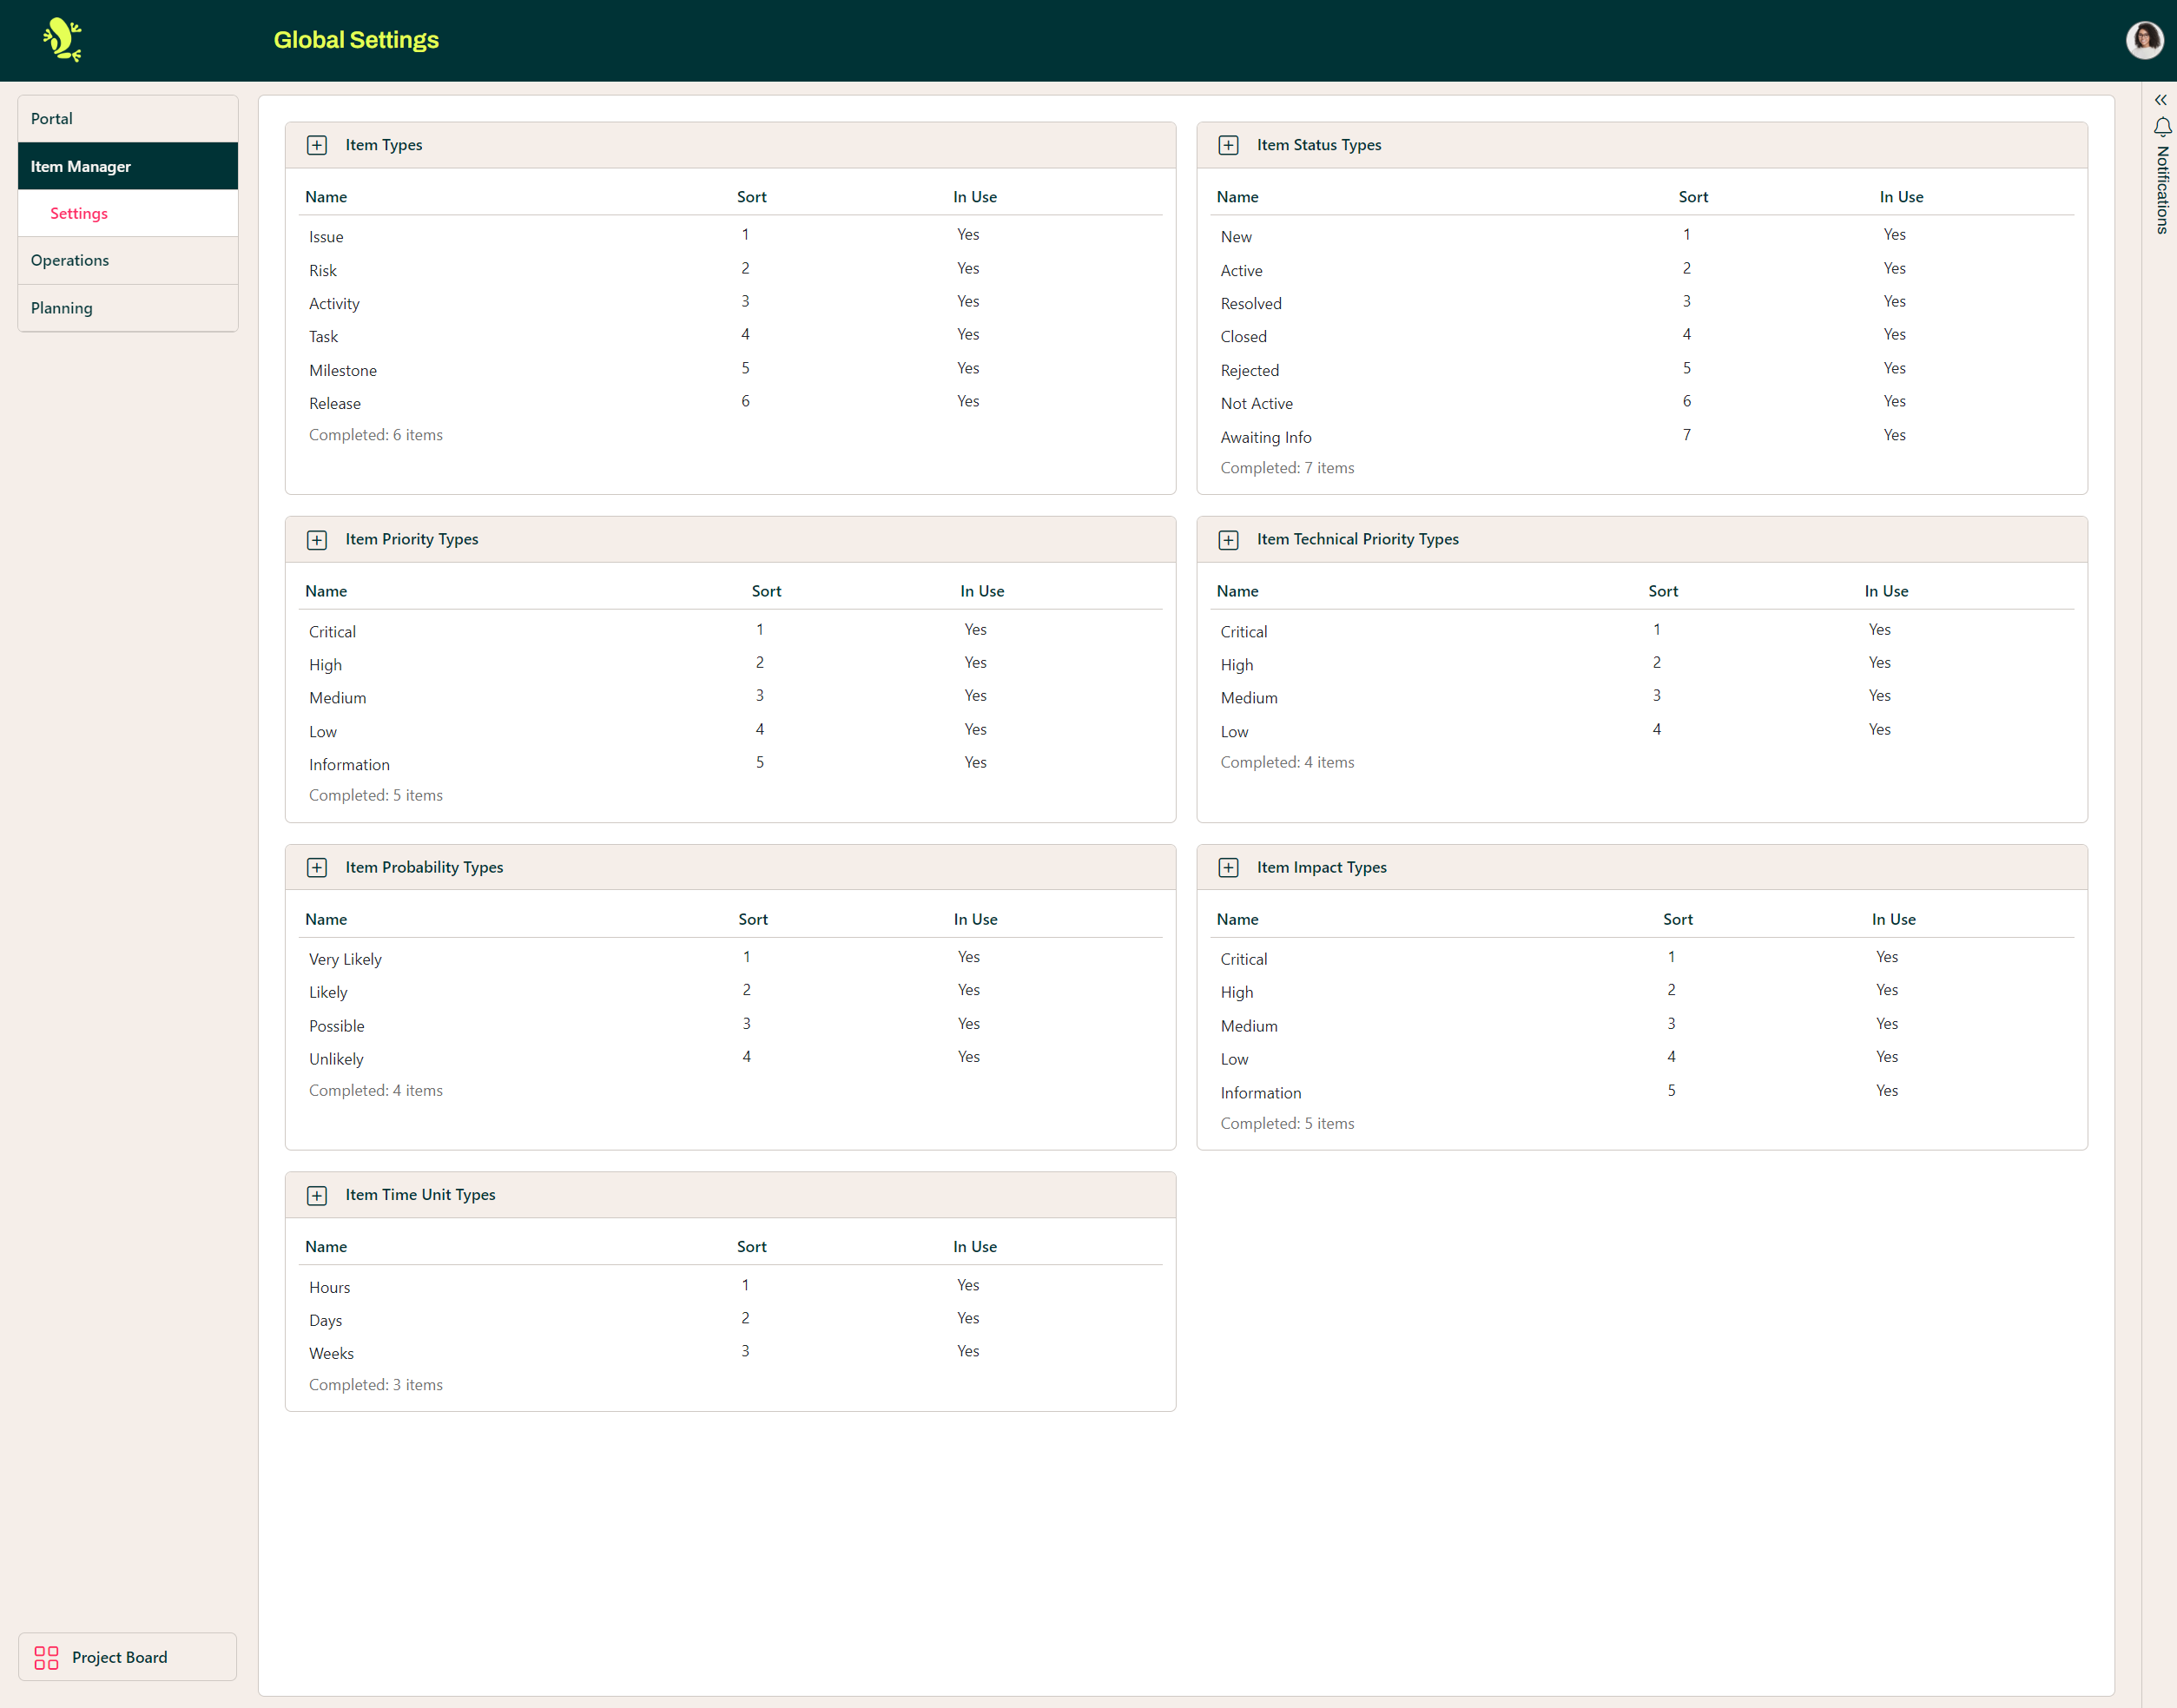
Hopp delivers the Item Manager Module with a set of pre-configured Item Types that can be changed, deleted or new types added.
All the mentioned fields on this screen can all have values changed, added, and removed.
Creating the Item types and their properties that are suitable for the project should happen at the start of the project. Once users have used the available Item types it is difficult to move or rename them.
Changing the Configuration of an Item Type
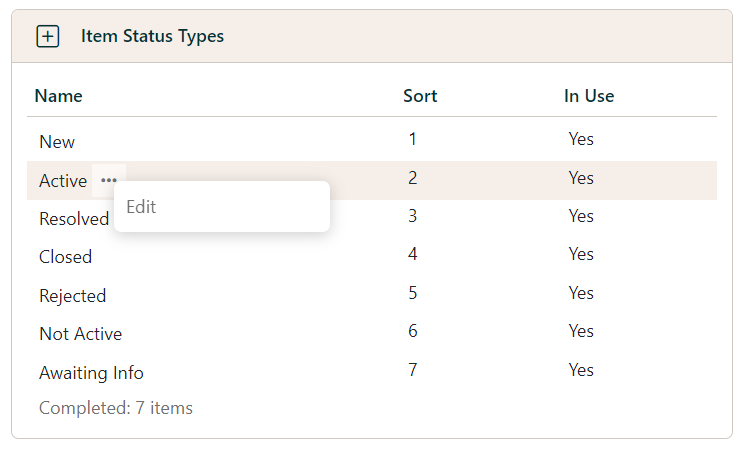
For each Item Type an Administrator can specify the sequence in which it appears in any drop down and give it a Description as well as a Title. You can also disable an Item Type so that it does not appear in the list of Item Types when creating Items, but any Items of this Type will remain in the list and not be deleted.
There are nine optional fields that can be included in the Details tab on an Item and which of these appear is defined on the Item Type, in addition they can be defined as Mandatory and if there is an associated list of values a Default value can be selected.
Item Types may be defined at the Portal level, which are used by default when creating a Project, or at The Project level if this is selected once the Project has been created.
Go to the Configuration part of the Portal.
To change the global configuration of an Item Type navigate to the Settings option under the Item Manager heading if you wish to change an Item Type used Globally.
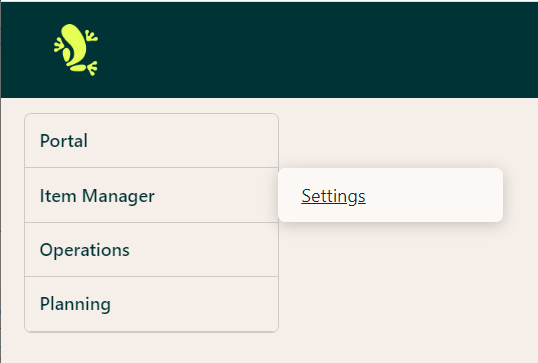
An Administrator can then select the Item Type you wish to amend by hovering over the Name and clicking on the ellipsis (three dots) that appears and selecting Edit.
This will display a dialogue box where you can change the configuration of the Item Type.
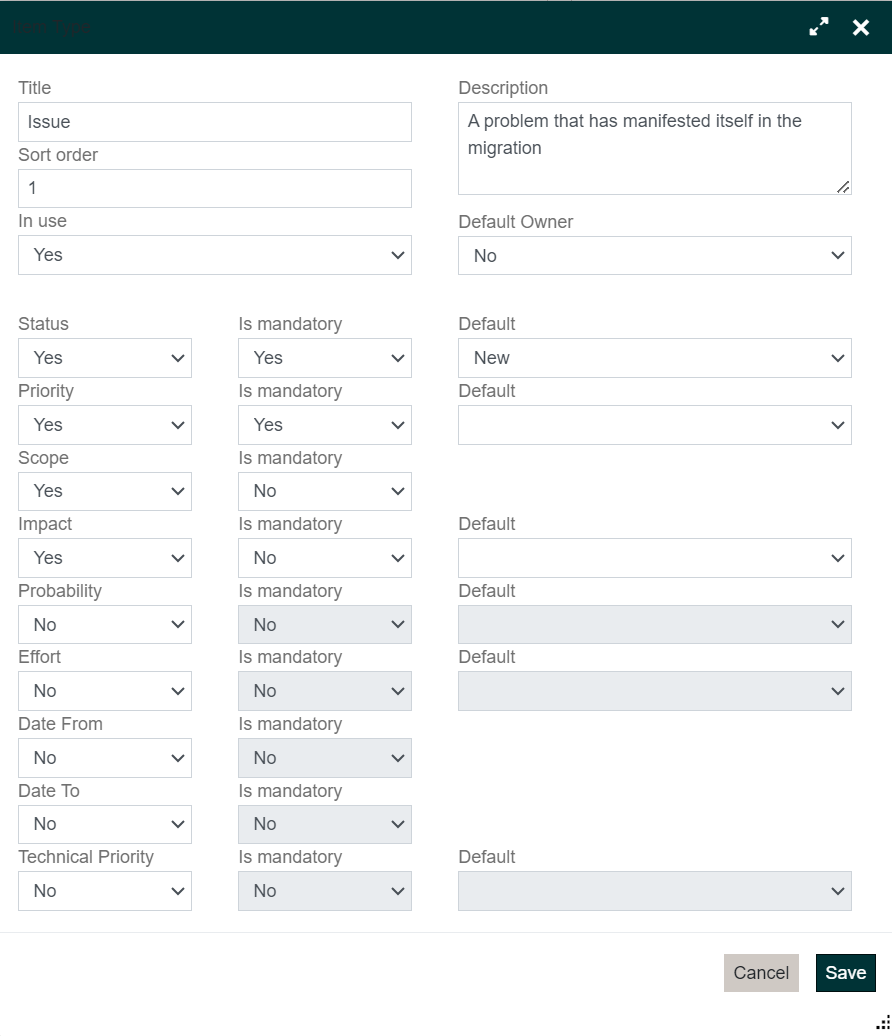
An administrator can change the Title, Description, Sort Order and enable or disable the Item Type at the top of the dialogue and select the optional fields to be used for the Item Type at the bottom. For each of the optional fields, you can define whether they should be Mandatory or Not and if there is a list of values associated with the field select a Default value to be filled in when an Item of this type is created.
Make your changes and click on the Save button.
Changing the list of Values for a Field
Go to the Configuration part of the Portal and select Item Manager - Settings.
To change the value displayed for an entry in the list of values for an optional field follow the instructions in the "Changing the configuration of an Item Type" section above until the Item Types and Lists of Values are displayed.
Any of the lists of values, e.g., Item Status Type, can be updated. A new value can be added to the list or one of the existing values edited. To add a new value click on the plus sign to the left of the Title of the list of values in the header bar.
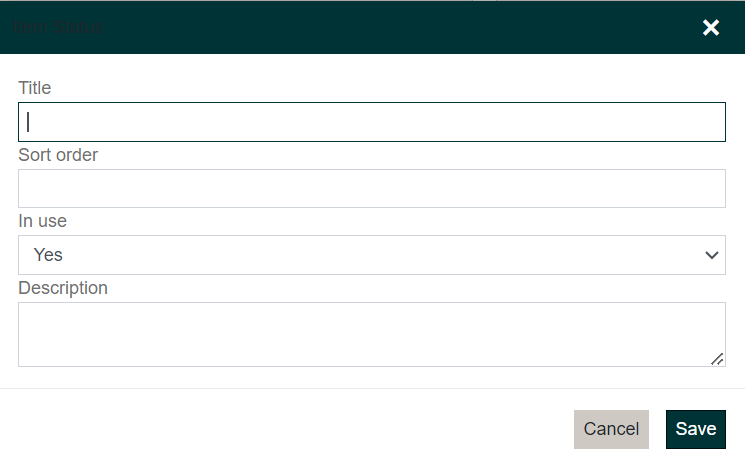
Complete the Title of the value, which will be displayed in the application if this value is selected, the order in which the value should be displayed in any drop-down list, leave the In use flag as Yes, and complete the description so that other administrators understand what you intended with this value.
If you wish to update an existing value, click on the ellipsis (three dots) displayed after the Title and select Edit.

Any of the fields may then be updated.